
Audio Annotation in Supervisely: Label Sound Events on a Waveform and a Spectrogram
 Ira Soldatova
Label speech, machine noise and other sound events in Supervisely as time segments on a waveform and a spectrogram, with spectrogram settings fixed for the whole project.
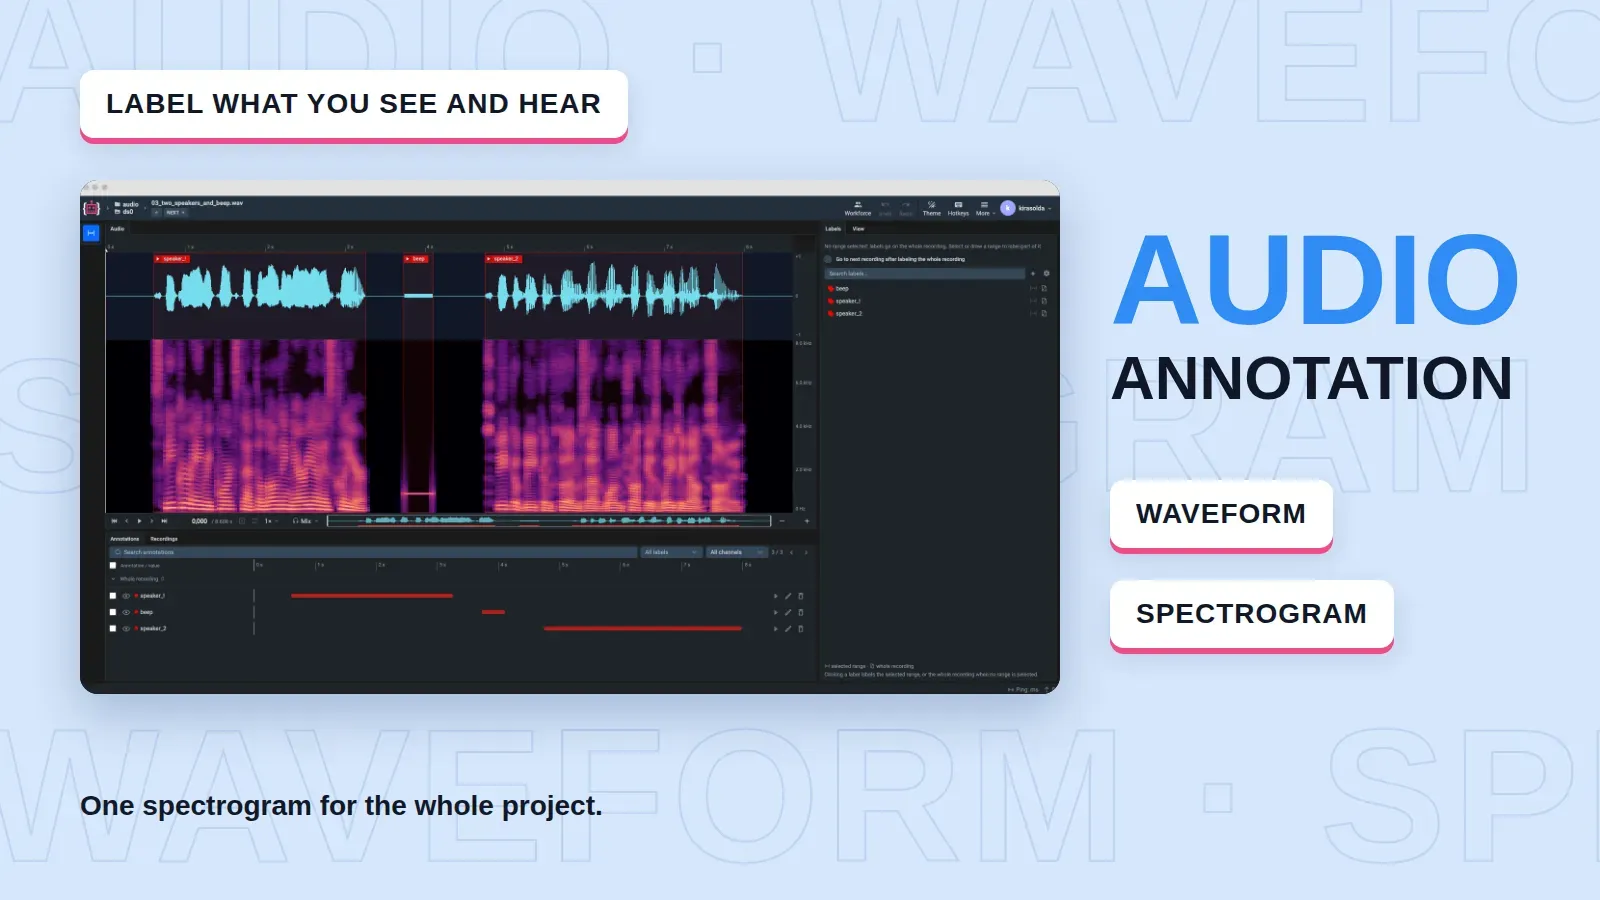
Supervisely now has Audio projects: you label a recording by selecting a time range on its waveform or spectrogram and picking a label. The spectrogram settings belong to the project, so every annotator labels on the same picture, and your training code can compute the same spectrogram later. This post shows how to label, review and set up the spectrogram, on a short recording of two speakers and a beep.
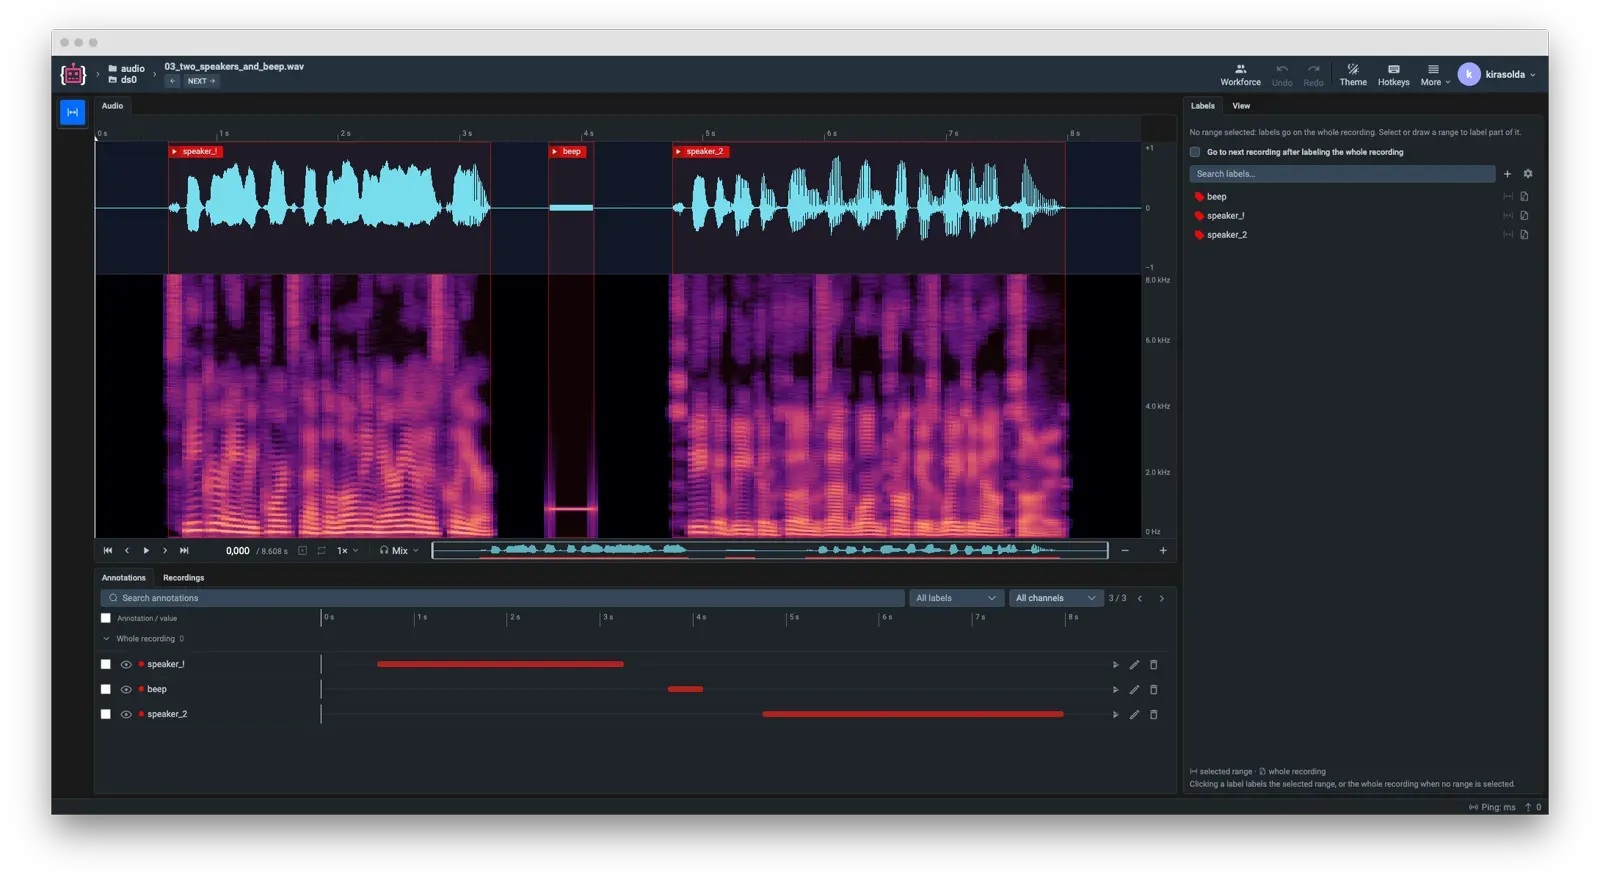 The Audio Labeling Toolbox: the waveform and the spectrogram on one timeline, three labeled segments and the Annotations tab below
Prefer the full reference? Audio in the Supervisely docs covers every setting, hotkey, import format and browser requirement.
When the spectrogram helps
The waveform shows how loud the sound is over time. That is enough to find speech turns or a knock with silence around it. It does not show pitch, so two different sounds at the same volume look alike.
The spectrogram shows which frequencies sound at each moment. In the recording above, the beep between the two speakers is a flat block on the waveform and one bright line at a single frequency on the spectrogram. Speech shows as stacked bands that rise and fall. A whine in an NVH (noise, vibration and harshness) test or a bird call in a field recording differs from the background by its frequency, so you find it on the spectrogram.
Both views share one playhead and one selection. You find an event on the spectrogram and check its loudness on the waveform without lining anything up.
If a file needs only one label, such as a pass or fail verdict for a test run, tag the whole recording instead of drawing segments. It takes one click, as shown below.
Label a segment
Drag across the waveform or the spectrogram to select a range. Click Choose a label next to it, type to search, and pick a label. If the label has a value, enter it: for a one-of value, keys 1–9 pick an option. Enter saves the segment and Esc cancels.
A plain click only moves the playhead. Shift-click selects a single sample, to mark a moment rather than a span. A segment covers the selected samples with both ends included, so its start and end are exact sample positions, not rounded milliseconds.
A label goes on the channel you are viewing. The headphones menu in the transport bar switches between Mix, which plays all channels and labels them all, and Ch N, which labels channel N only. In a recording from several microphones, this keeps a sound heard on one microphone from being labeled on all of them.
With many labels, the Labels tab is faster. Select a range and click a label, or press the label's hotkey. With no range selected, the same click tags the whole recording. Set each label's scope in the project's tag settings (ranges, whole recording or both), so a file-level label such as the test verdict cannot end up on a segment.
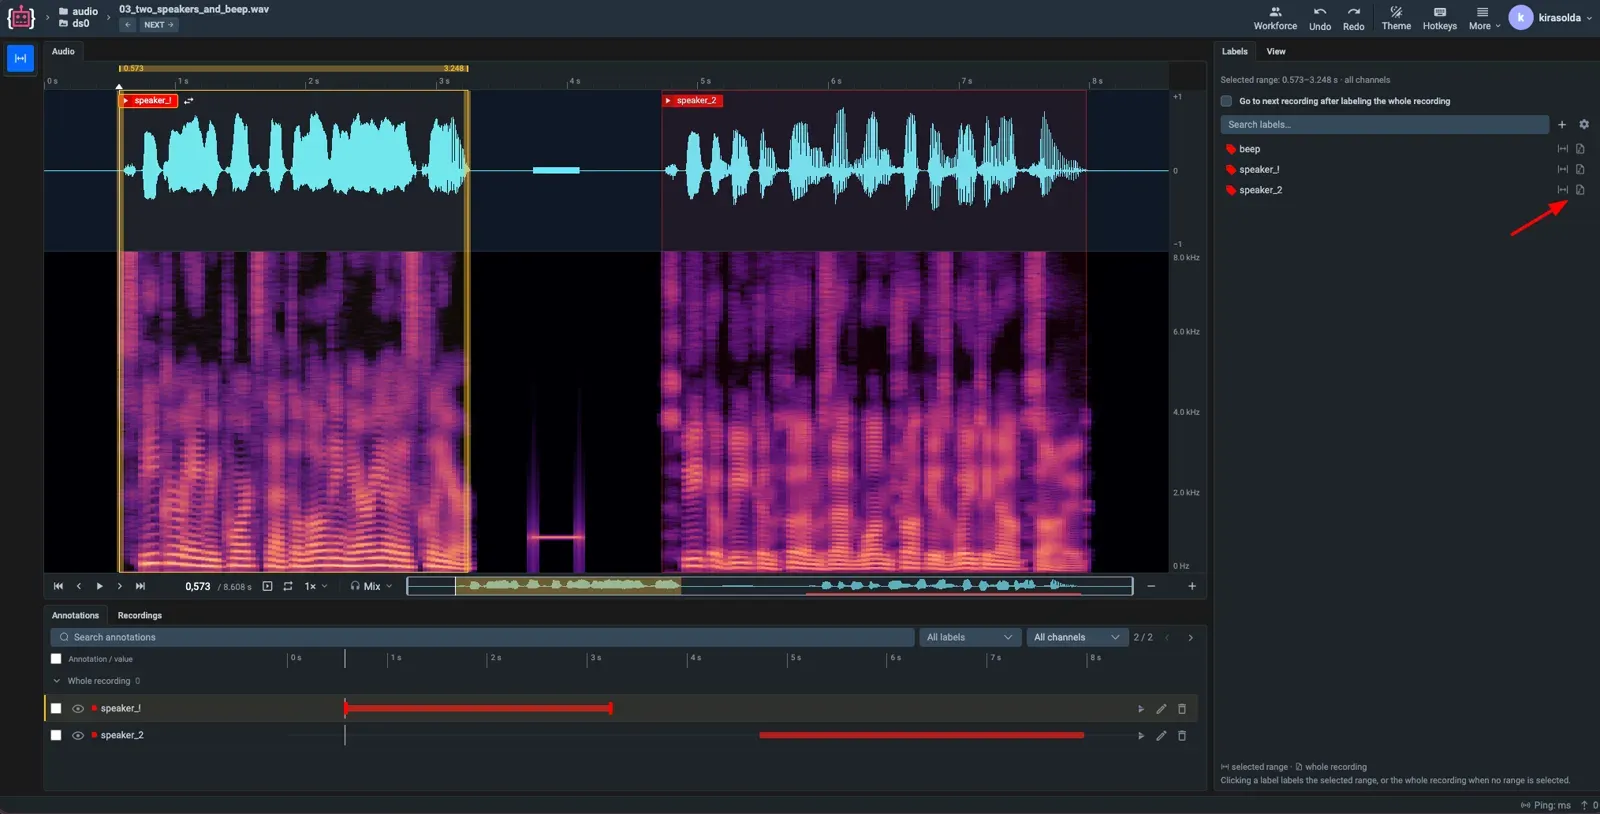 The Labels tab: each label has one button for the selected range and one for the whole recording
Tag the whole recording
Some labels describe the file, not a moment in it: the recording site, the microphone, the test result. Click a label with no range selected, or use its whole recording button. The tag applies to all channels and shows as a badge above the plots. Click the badge to edit its value.
To classify many files, tick Go to next recording after labeling the whole recording. Each click then tags the file and opens the next one.
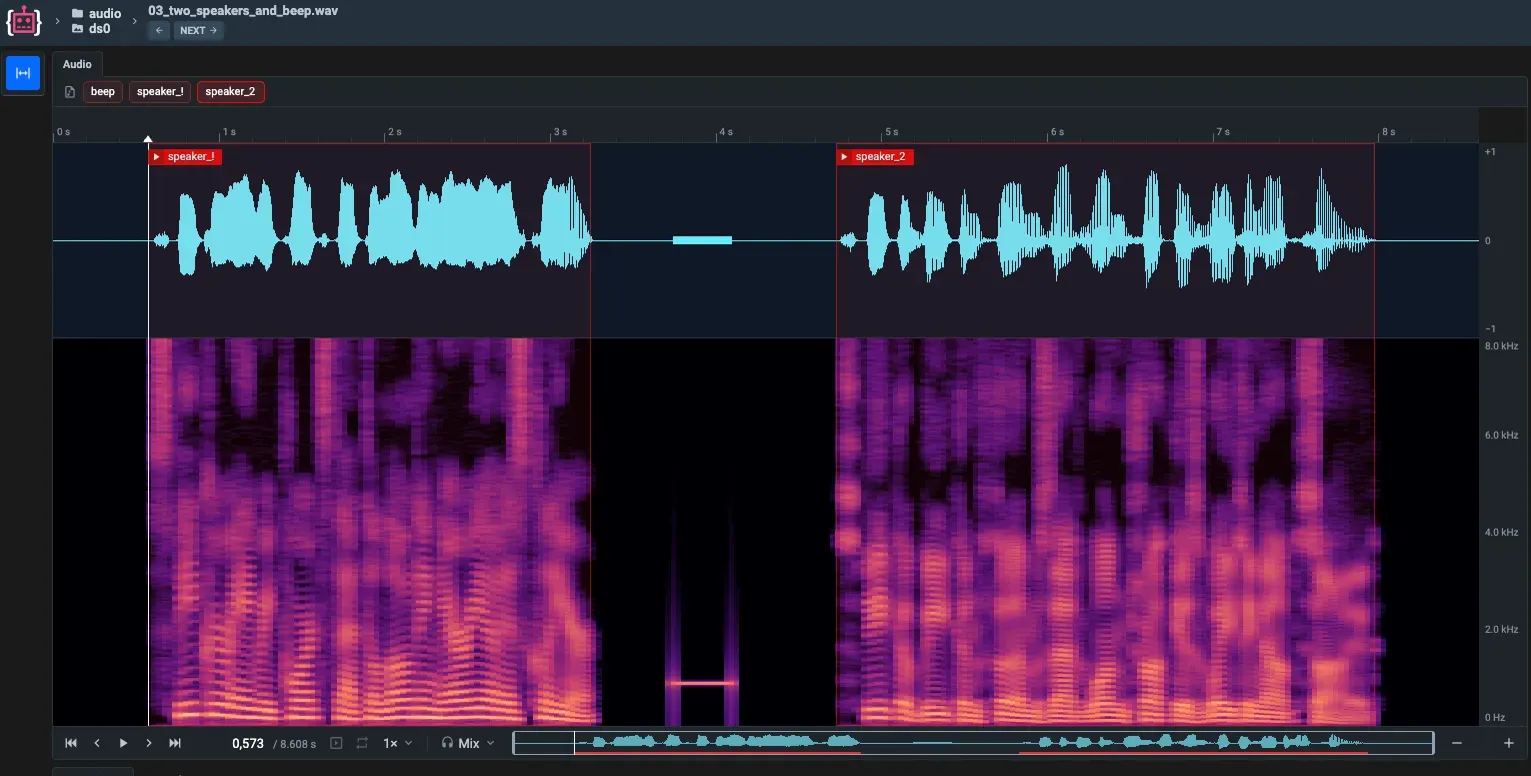 Whole-recording tags shown as badges above the waveform
Review and fix labels
Click a segment to select it. Drag its edges to resize it, or Alt-drag to move it. The change stays a draft until you click the check mark (Save changes), so a slip of the mouse does not move a finished label. Esc cancels the draft. Change label swaps the label and keeps the range and the channel.
The Annotations tab lists every segment and whole-recording tag of the recording on a small timeline. Filter it by label or channel to check one class at a time. The pencil opens an editor with Start and End (inclusive) in seconds or in samples, so you can type a boundary when dragging is not precise enough.
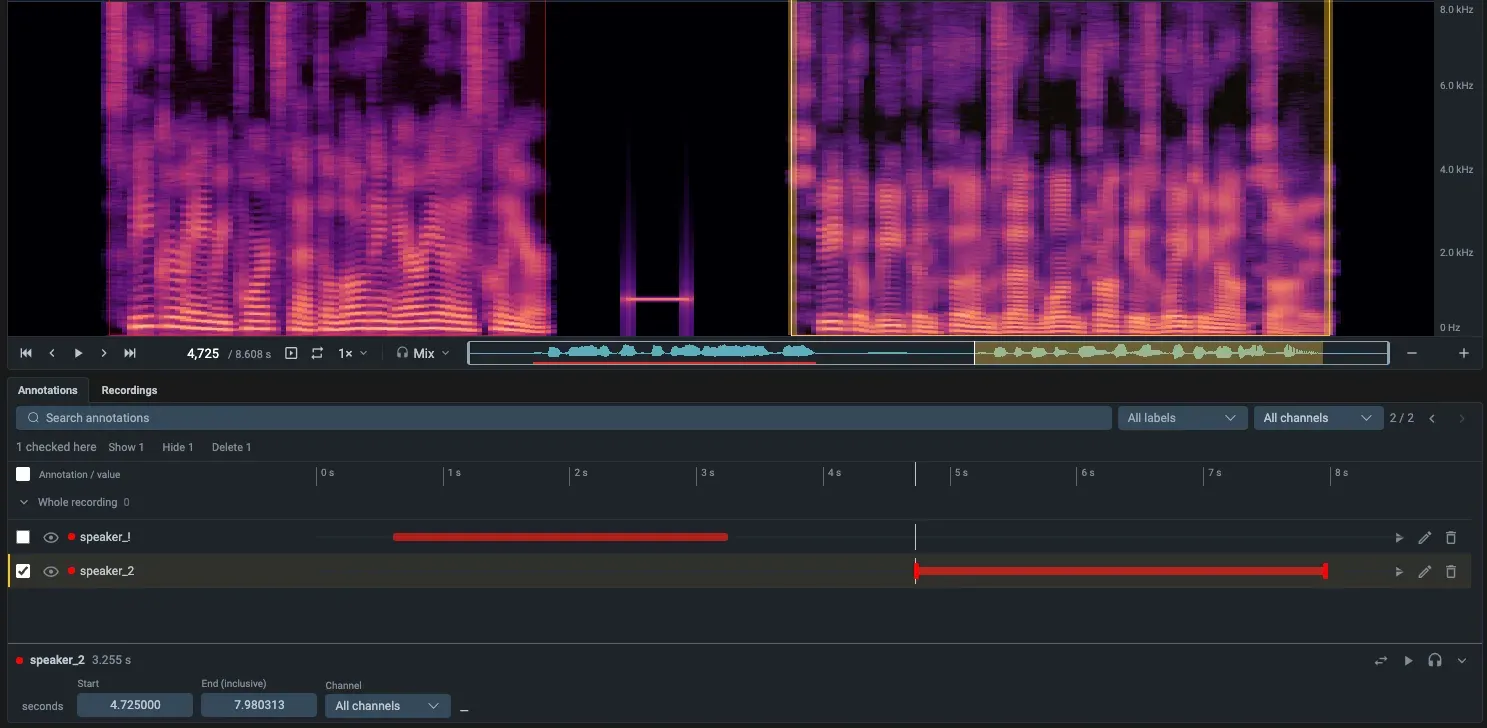 The Annotations tab with the inline editor for a segment's start, end and channel
To check labels by ear, press Shift+N or Shift+P: the toolbox selects the next or previous segment and plays it. Shift+L loops the selection. Playback runs from 0.25× to 2×, so you can slow a short event down to hear where it starts.
Set the spectrogram once, for the whole project
A spectrogram is one of many possible pictures of the same sound, and its settings decide what you can see. A short FFT window separates events in time but blurs close frequencies together. A narrow contrast range hides quiet events. Labels drawn on different pictures cannot be compared, so the settings belong to the project: every recording is shown with them, for every annotator.
The settings are in the View tab. Until you save them, the banner says Not set for this project and recordings use the default analysis. Click Save for project, or change any setting, and they are fixed for everyone. Every later change applies to the whole project at once.
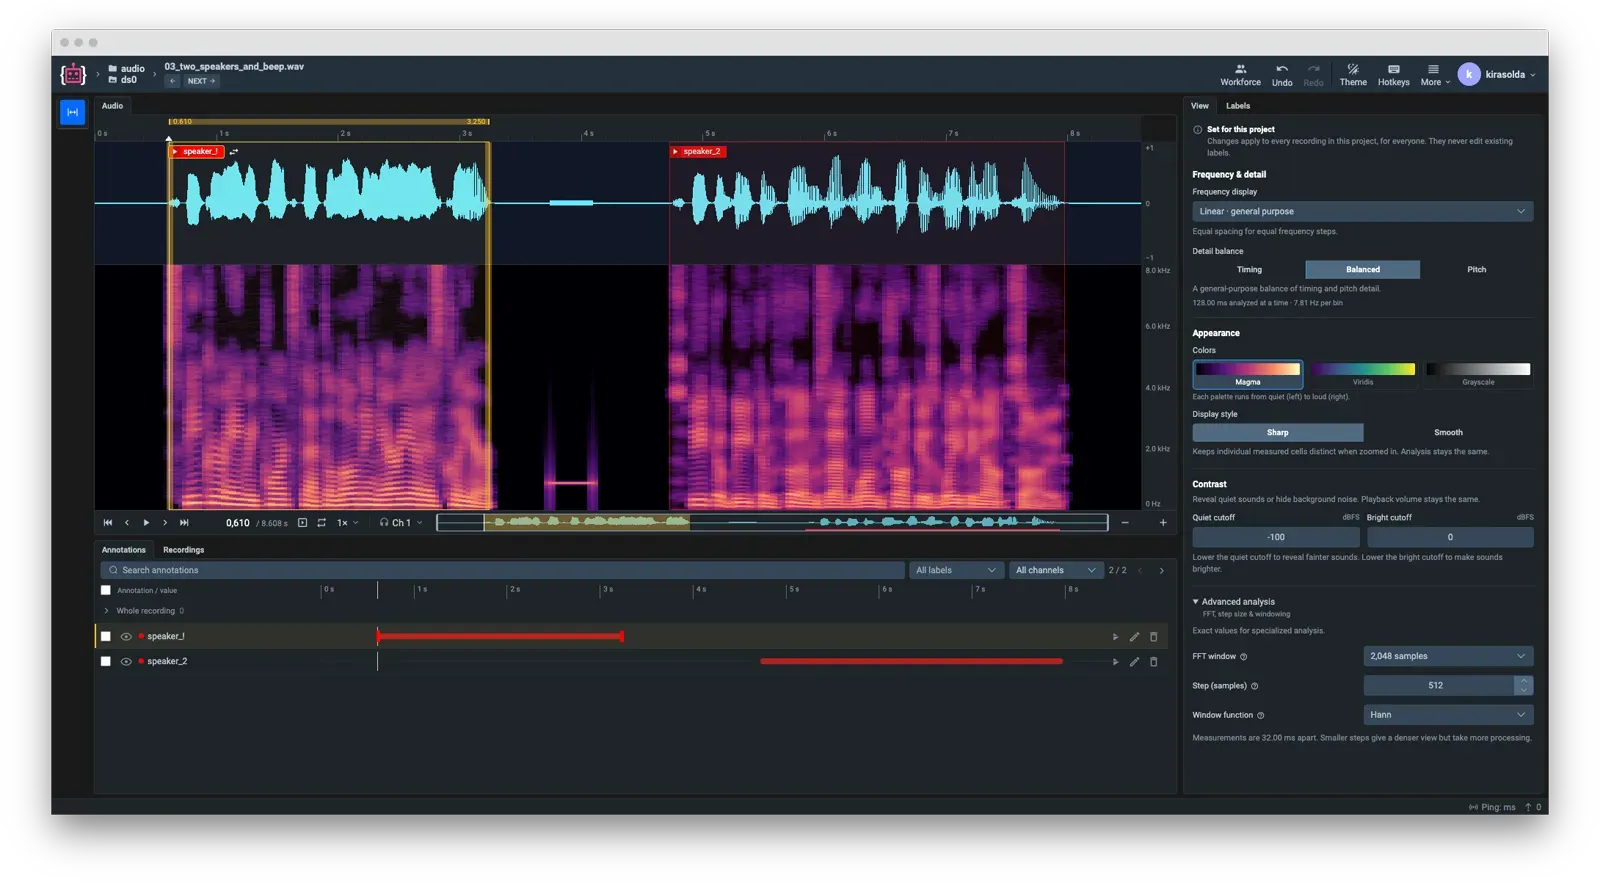 The View tab: spectrogram settings saved for the project
-
Frequency display. Linear for general use, Logarithmic to give lower pitches more room, Mel for speech.
-
Detail balance. Timing, Balanced and Pitch use FFT windows of 512, 2048 and 8192 samples. Choose Timing to see exactly when short impulses start, and Pitch to separate tones that are close in frequency.
-
Quiet cutoff and Bright cutoff. They set the dBFS range the colors span. Lower the quiet cutoff to see faint sounds.
-
Colors and Display style. They change only how the picture looks, not the analysis.
-
Advanced analysis. Exact FFT window, step and window function, when your task needs specific values.
Existing labels are not changed when a setting changes, but they were drawn on a picture that no longer matches. Choose the settings on a few typical recordings before labeling starts.
The settings are exported with the project. Your training code can compute the same spectrogram from them, for example as input to a PyTorch or TensorFlow model, so the model sees what the annotators saw. The Python SDK tutorial for audio renders spectrograms with the project's settings and exports training crops of labeled segments.
Where it helps
-
NVH and acoustic quality inspection. A rattle or a whine has its own frequency, so it stands out on the spectrogram. Label it as a segment, and record each test run's verdict as a whole-recording tag.
-
Bioacoustics. Calls in field recordings are often short and quiet. Lower the quiet cutoff to see faint calls, then step through the labeled calls with Shift+N to review them.
-
Sound event detection. Segments with exact sample boundaries and per-channel labels give a detection model the start and end times to learn from.
-
Speech. Mark who speaks when, with one label per speaker, as in the recording in this post. The Mel display suits speech.
How to try it
-
Open Projects and click + New → New project wizard.
-
Choose Audio as the type of project, name it and create it. The type cannot be changed later.
-
Import recordings with the import wizard, or from Team Files or Cloud Storage. WAV, FLAC, MP3, OGG and M4A are supported. Files are uploaded, not added by link.
-
Open a recording, set the spectrogram in the View tab and save it for the project before labeling.
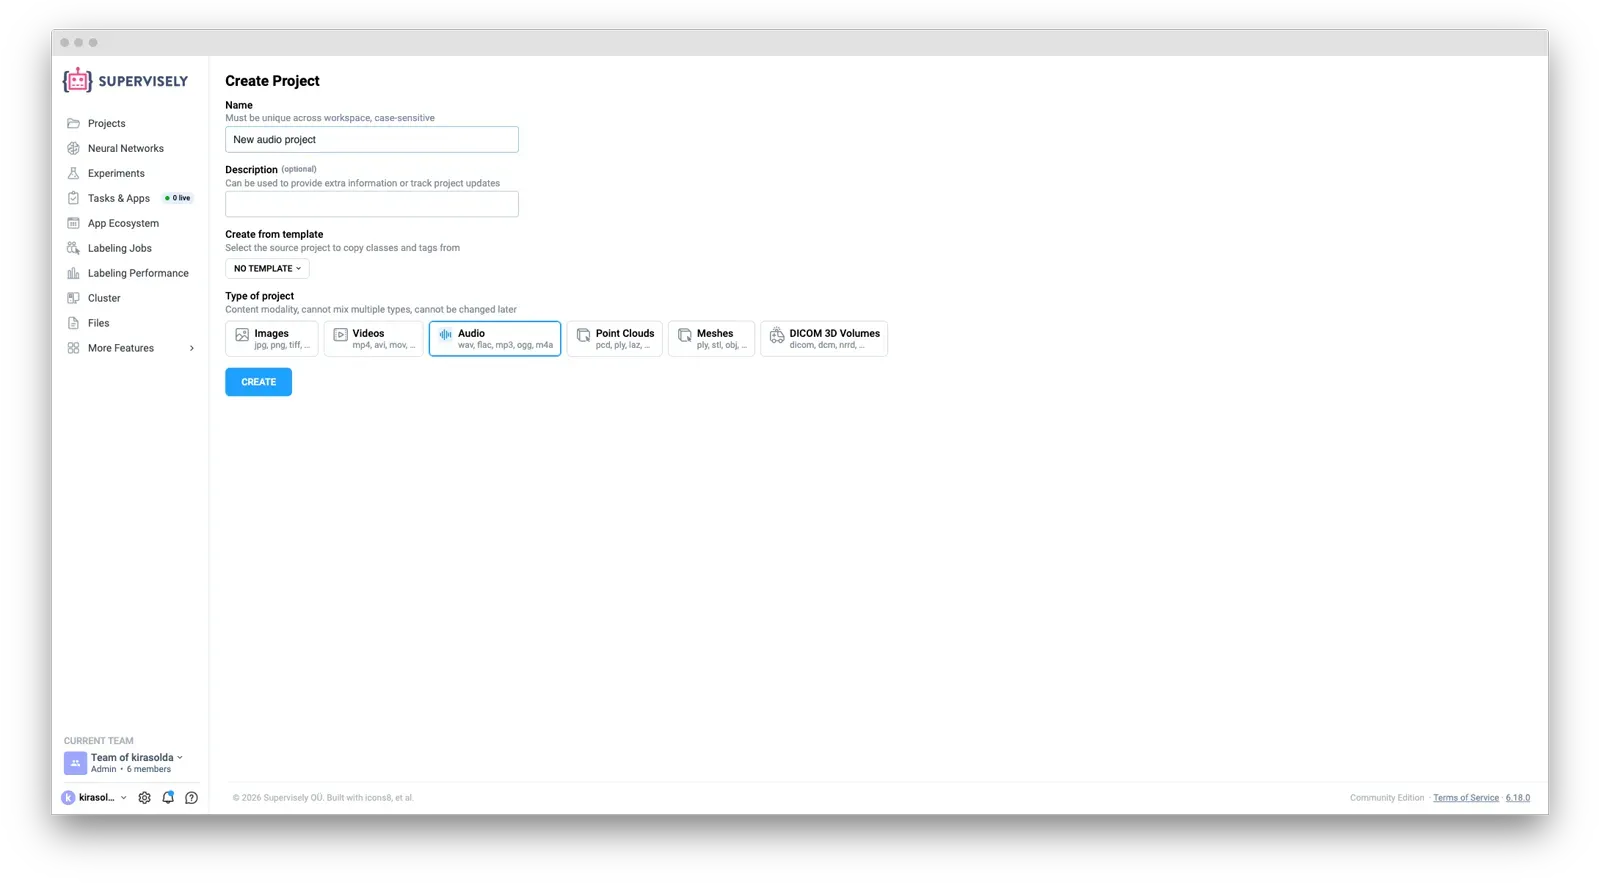 Create Project with Audio selected as the type of project
To try the toolbox without your own data, add the sample project from the Ecosystem:

Audio Annotation Sample Project
Practice project with audio recordings. Perfect for trying audio segment and recording tagging.
Audio projects need Supervisely 6.18.0 or newer and a license that includes the audio recordings module. If you do not see Audio among the project types, ask your administrator. WAV, FLAC and MP3 play in any supported browser. OGG and M4A are decoded by the browser, which needs the instance to be opened over HTTPS. From Python, use Supervisely SDK 6.74.41 or newer.
To take the labels out, run Export to Supervisely format. It keeps the segments, the whole-recording tags and the spectrogram settings.
Questions, or a large audio dataset to label? Contact us. Every setting and hotkey is in the Supervisely docs.