Best DICOM & NIfTI annotation tools for Medical Imaging AI

Learn how to label CT, MRI, and PET medical images for your computer vision models.
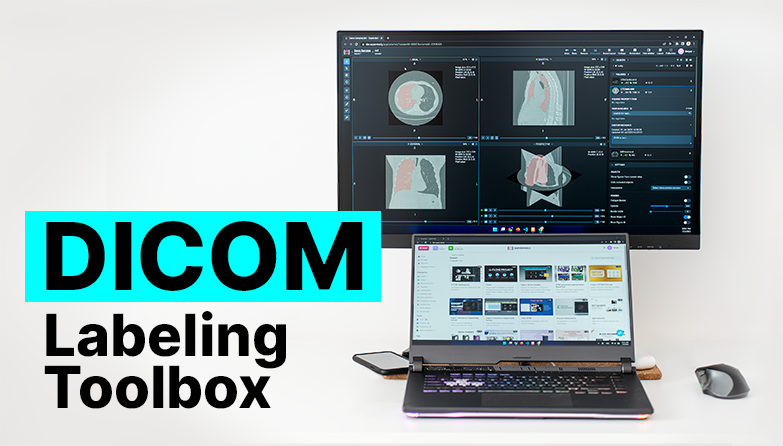
Table of Contents
Medical image annotation for computer vision models requires domain expertise and highly-specialized labeling tools. Over several months of work, I've had the opportunity to develop the functionality of DICOM annotation tools, and I've prepared this article to help you learn how to use different labeling tools on medical volumes to segment objects in 3D.
Supervisely's DICOM annotation and collaboration platform is designed for Healthcare AI:
-
Works directly with original DICOM files and 3D objects.
-
Compatible with ITK Snap & 3D Slicer & MITK, includes best practices, and has a similar user experience.
-
Web-based interfaces - you just need a browser.
-
The on-premise solution guarantees privacy and meets the highest industry standards.
Our DICOM labeling tool has been developed utilizing user experience from popular tools such as MITK and 3D Slicer, which are highly regarded in the medical field. Doctors and physicians don't have to spend time learning new instruments, Supervisely will feel familiar to them right from the beginning. We closely collaborate with our clients and community users, who are experts in medicine, and constantly incorporate their feedback. Their expertise, combined with the experience of other professionals in this domain, has played a crucial role in creating a tool designed for the healthcare industry.
Supervisely DICOM annotation toolbox completely supports DICOM standards and allows to work with volumetric medical scans, including CT (computed tomography), MRI (magnetic resonance imaging), or PET (positron emission tomography).
In this quick video overview, I will provide key features of this tool and highlight what makes it so great.
The Interface you already know
For ease of use, we have made the interface of our application similar to the user interface of the popular medical applications mentioned above.
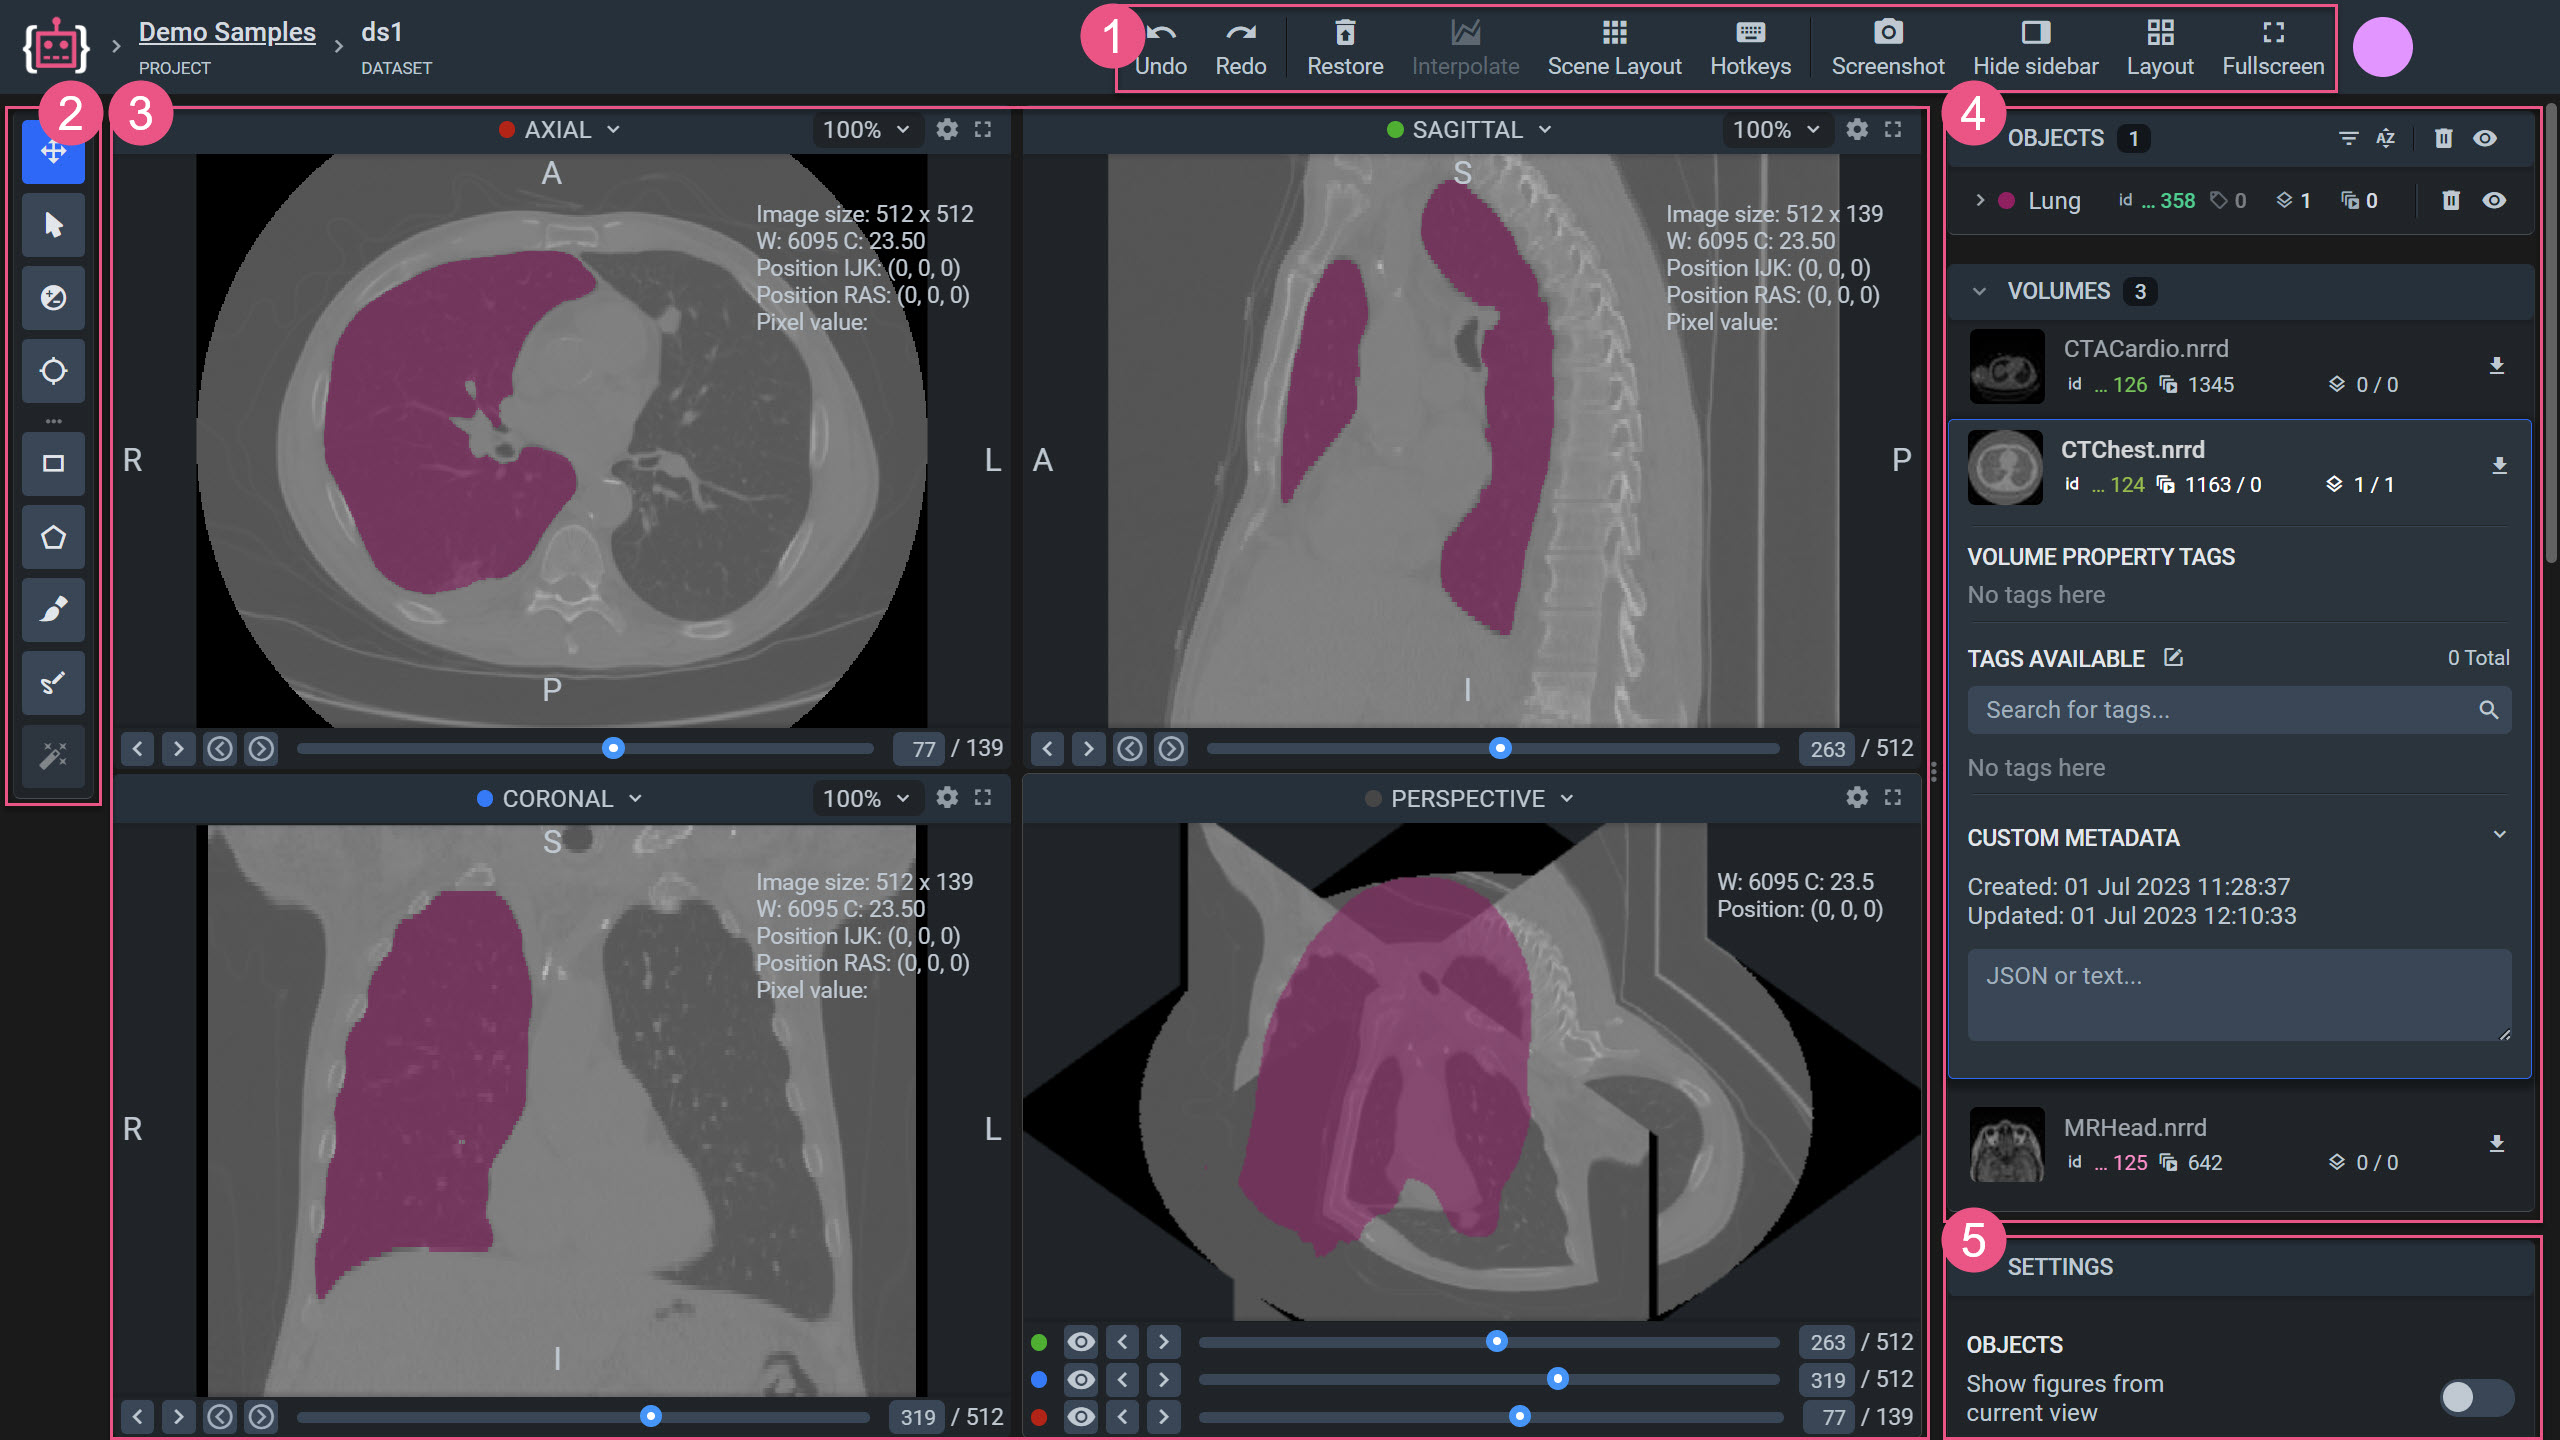
Here's an explanation of what you see in the image:
-
Panel featuring a highly important tool Interpolation, a button for capturing screenshots, a hotkeys map, layout settings, and history of operations.
-
Toolbar for navigating through planes and working with annotations.
-
Workspace with the Volume images at the planes and a 3D perspective.
-
Tabs that list objects, figures, volumes, and their settings.
-
Additional display settings in the interface.
The interface is fully customizable. If you're not satisfied with the default layout of the main tabs, you can always switch to the panel variant and rearrange everything according to your convenience. This feature is often lacking in some web applications, which undoubtedly sets our tool apart in terms of usability.
It is possible to rearrange the workspace grid up to 4 by 4 if you need to use multiple identical planes at different scales. This can be incredibly useful when performing highly precise annotations while having the additional benefit of seeing the entire plane simultaneously.
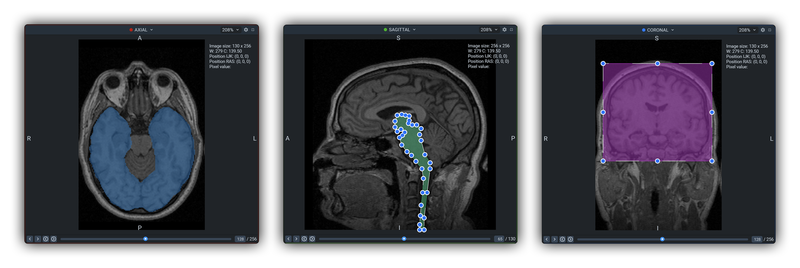
3D Objects and Interpolation
3D objects on medical volumes can cover hundreds of slices on different planes. So their segmentation is very time-consuming and expensive. You can manually label only the key slices on different planes and then apply an interpolation algorithm to automatically reconstruct an object on other unlabeled slices. All manual annotations as well as the final interpolation are presented as a single 3D annotation object, you can preview it on the 3D perspective and edit it on any plane.
If the interpolation result is not satisfactory, it can be undone, and for increased accuracy, additional intermediate elements can be added and the process can be restarted.
Fast labeling with interactive AI assistance
It is hard and time-consuming to segment objects over thousands of frames. Smart Tool helps you easily label the desired object in an image with just a few clicks because it is based on using various pre-trained neuron network (NN) models. All you need to do is frame the presumed object with a bounding box (bbox).
You can run multiple models simultaneously for different input data and quickly switch between them.
Windowing and Crosshair tool
Medical images usually consist of thousands of levels of gray, while standard computer screens are only capable of displaying 256 levels of gray. Additionally, the human eye has limitations in detecting minimal differences in contrast.
This Windowing feature adjusts image contrast and offers not only manual adjustment but also various presets and allows you to fine-tune the visualization of medical images, making various tissues and structures more visible and distinguishable.
If you need to select a specific image area in all planes, you don't have to do it individually for each plane. The Crosshair Tool allows in one click jump to any point of interest on all planes. By holding the selection point and moving the crosshair across the plane, you can observe real-time changes in the other planes and 3D perspective.
Native support for Mask 3D
The volumetric mask or Mask 3D allows you to create a 3D figure that will be rendered on all planes and can be edited across all planes. This is the primary, most convenient, and versatile option for annotating objects since we are working with volumetric data.
We have various instruments to create and edit Mask 3D for objects.
Mask 3D: Pen Tool
The Pen Tool is essentially a combination of Polygon and Brush, allows you to create fine lines along the edge of an object as if you were using the thinnest brush, and fills in the shape as soon as you close the outline. This tool can also be used to conveniently cut out any shape within a figure.
Mask 3D: Brush Tool
The Brush Tool is a versatile tool for drawing Mask 3D shapes and Bitmap with the ability to adjust its size on the fly. Also includes an "Eraser" for smoothing out any imperfections. If you draw a Bitmap contour, you can fill it using the "Bucket Fill" tool.
Mask 3D: Smart Tool
The Smart Tool significantly simplifies the annotation process and reduces the need for manual labeling of each frame individually. And when combined with Interpolation, the process of creating Masks 3D can be accelerated dozens of times.
2D Tools
Also, you can use 2D shapes such as Bitmap, Polygon, and Rectangle for 2D labeling purposes.
The Polygon Tool is used for annotating Polygon shapes on planes if you don't need much precision.
It's convenient to use the Rectangle Tool if you only want to mark an object without defining its outline.
 Bitmap Brush - Polygon - Rectangle
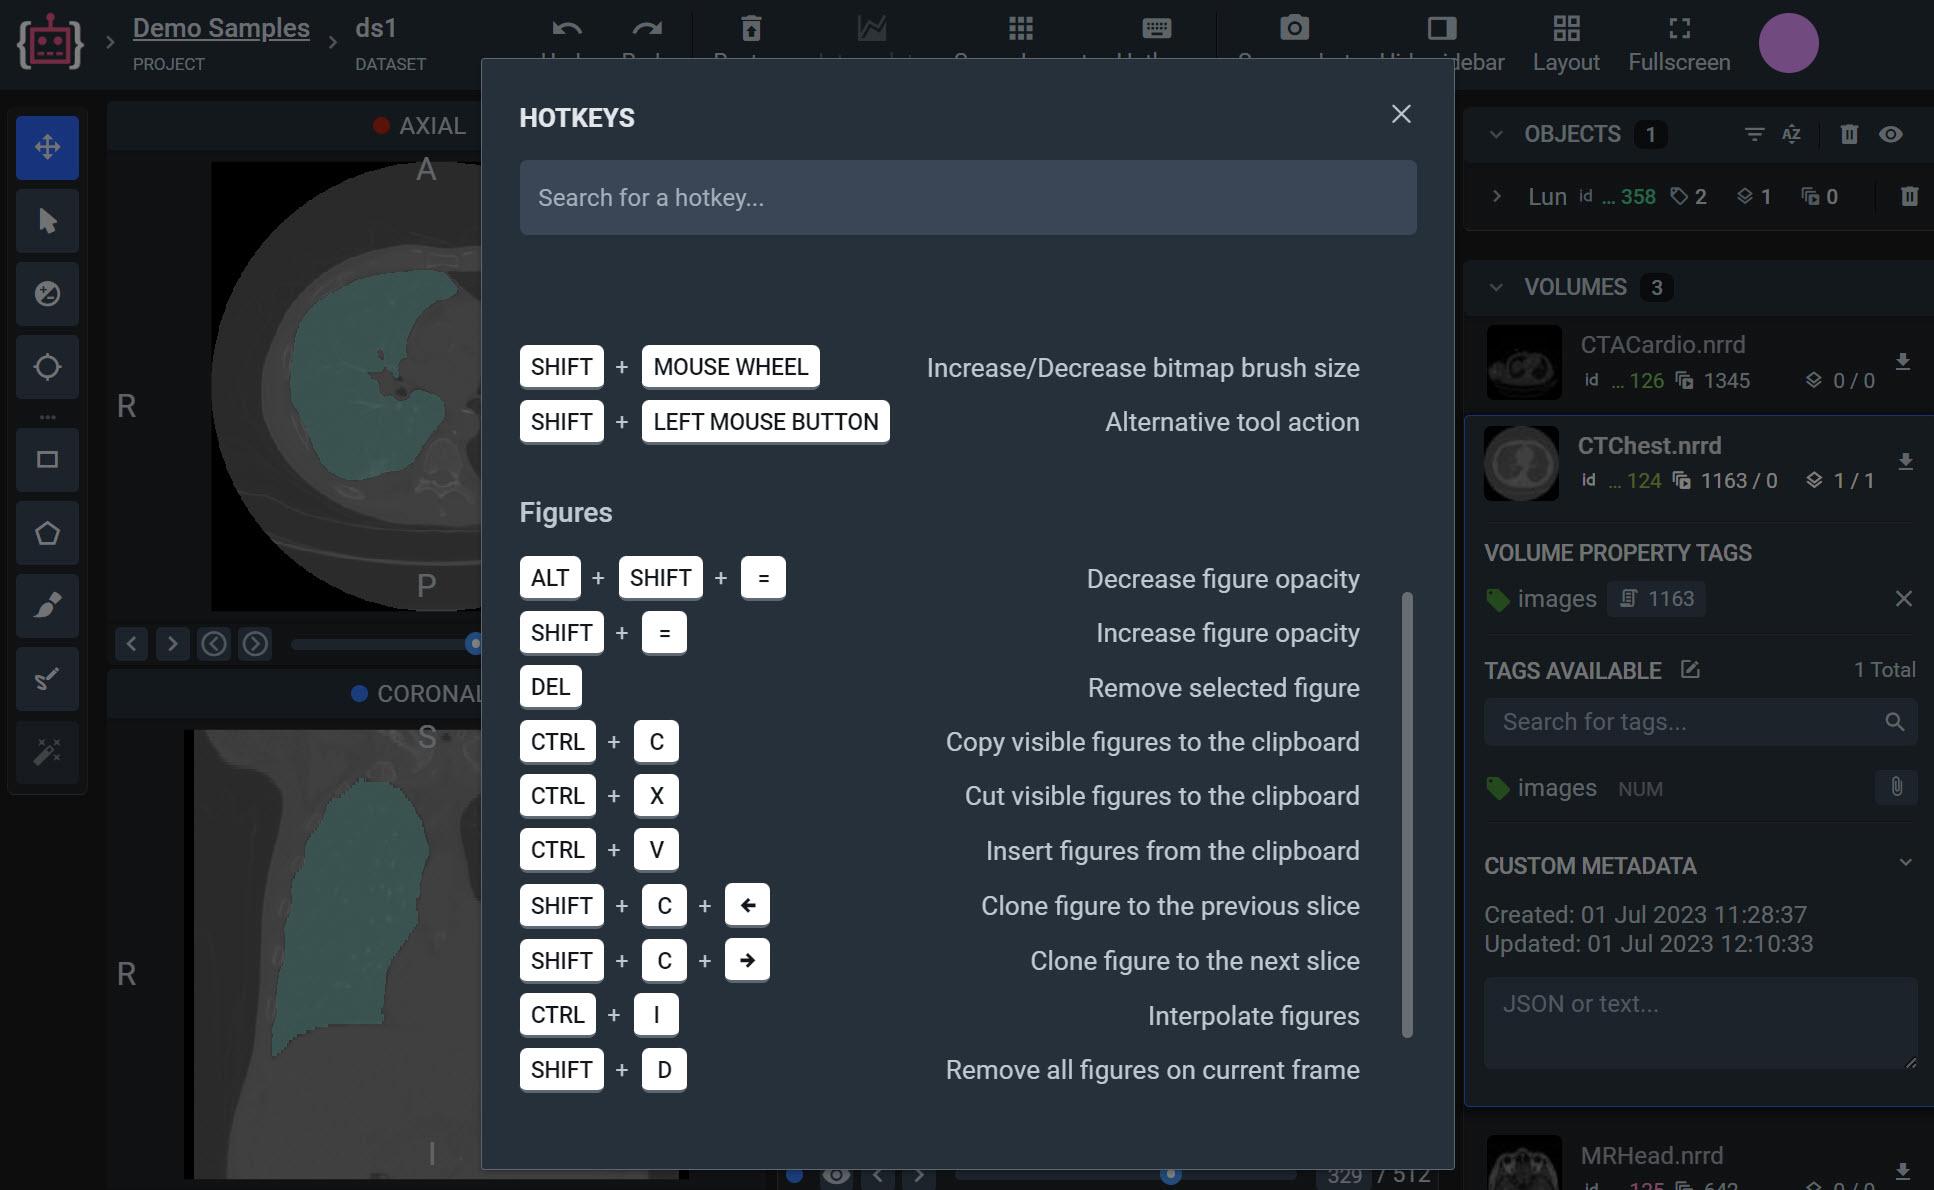
Hotkeys
There's nothing more convenient than keyboard shortcuts, the so-called Hotkeys, for switching tools, manipulating objects or adjusting display settings. And it's even better when you can customize the familiar combinations yourself.
Tags and Properties
It is important not only to annotate objects but also to add Tags that highlight their properties. For this purpose, a tagging system is used, which allows tagging not only objects but also volumes themselves.
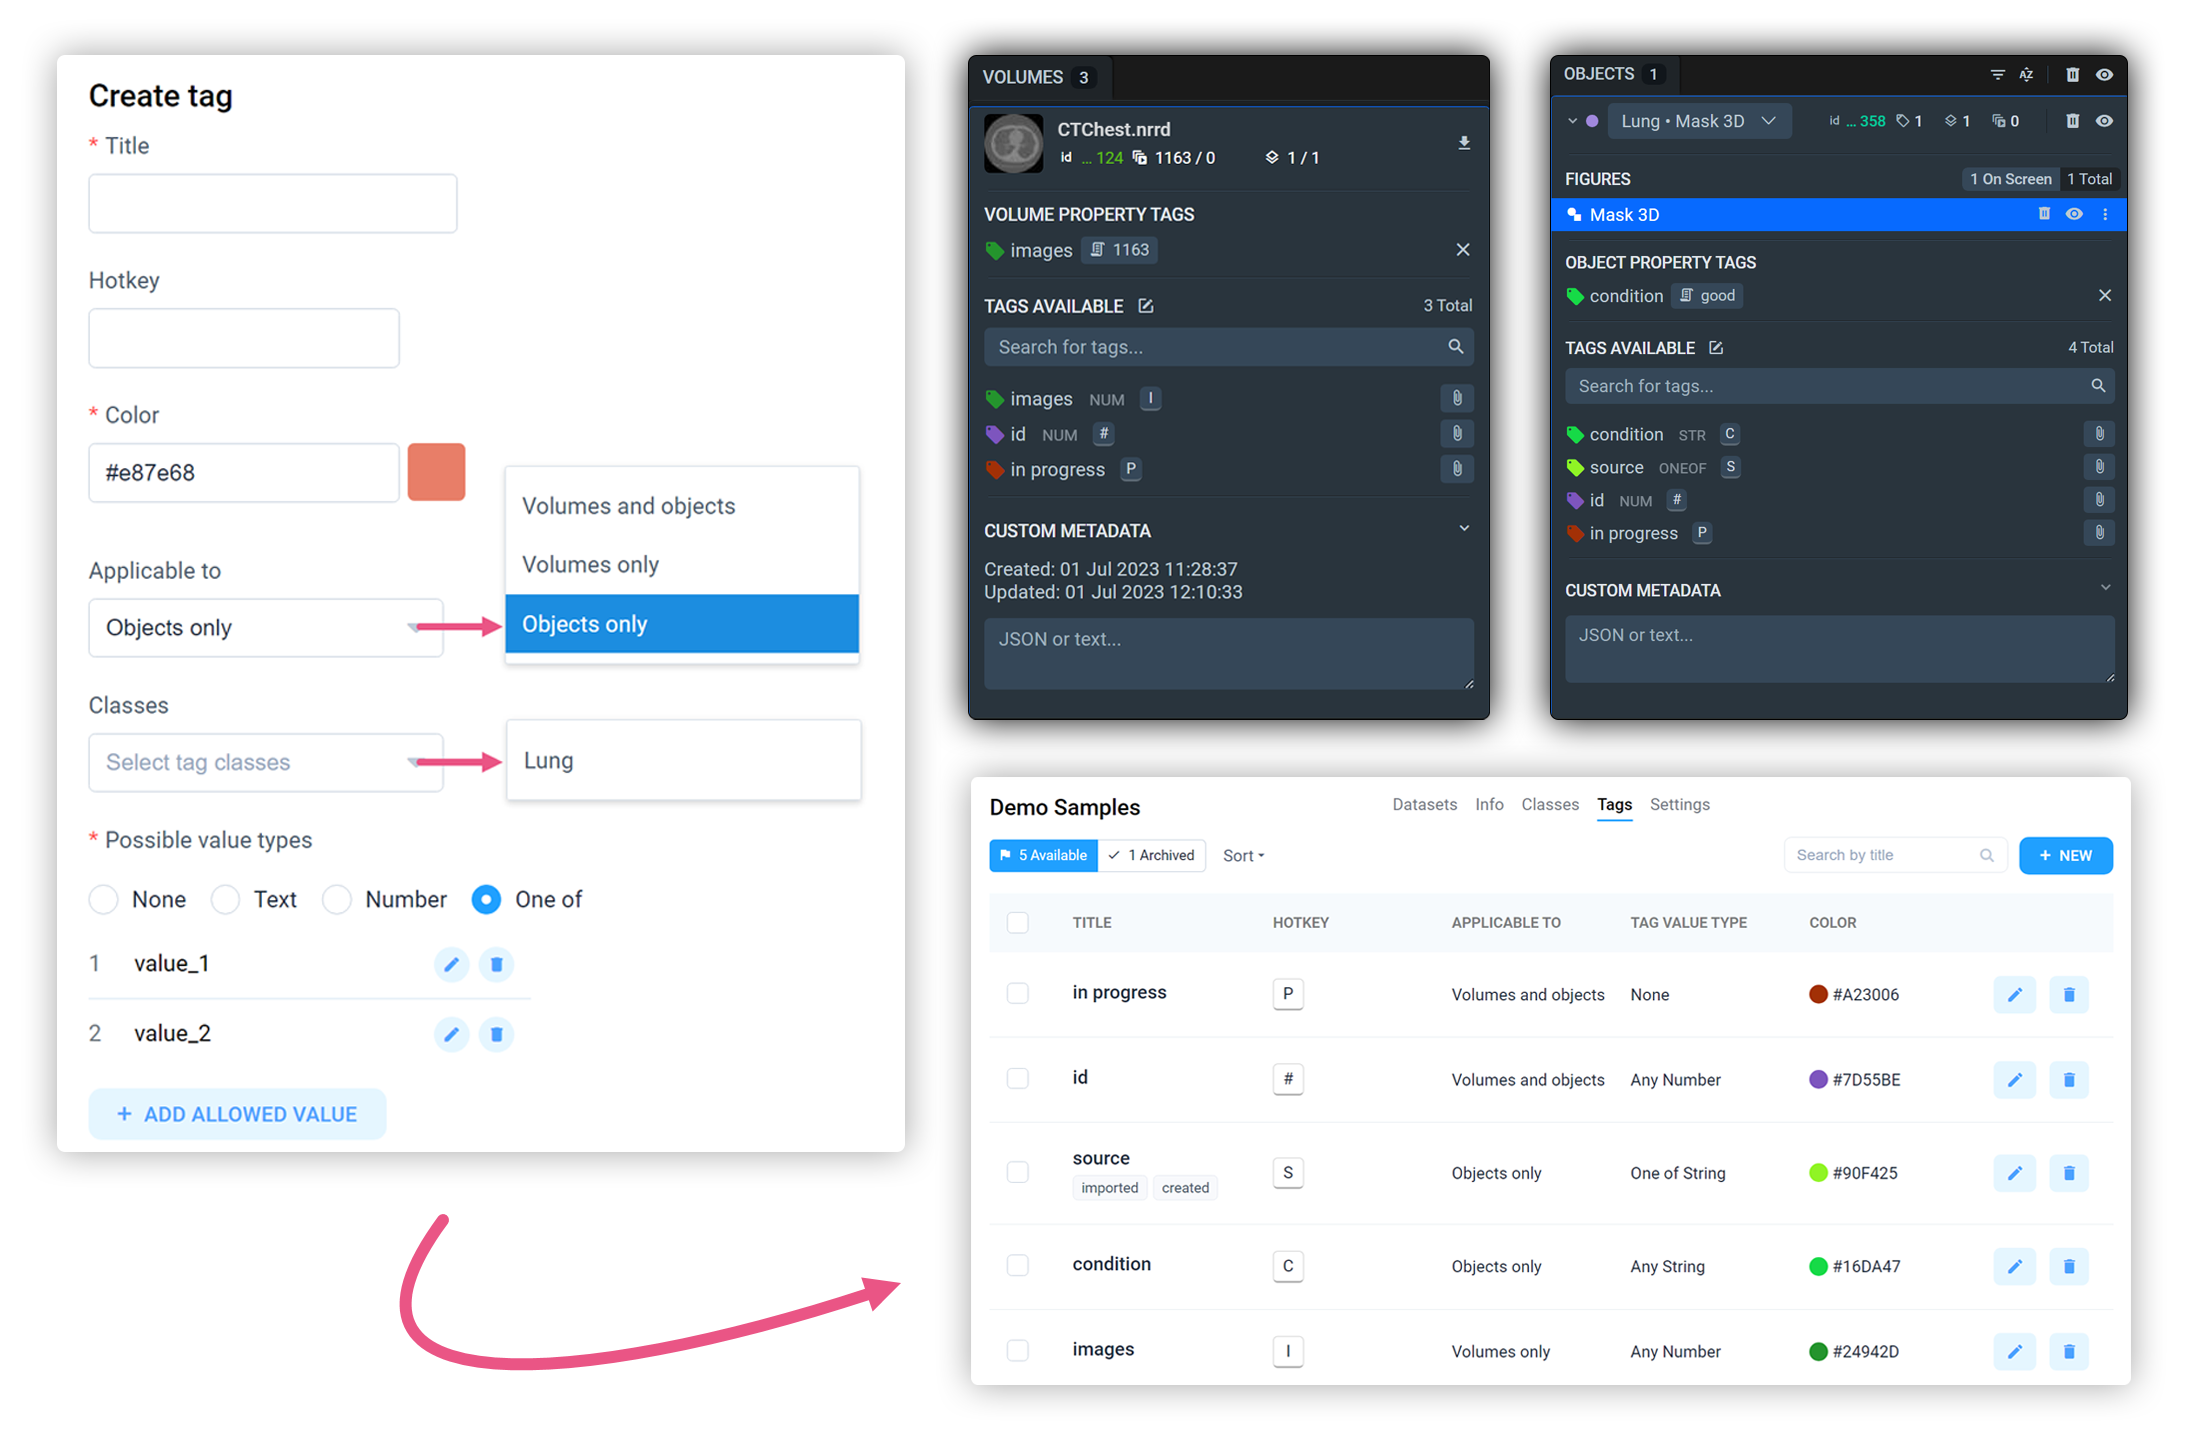
In data tabs, you can find and change Properties for objects, shapes, and volumes. For example, you can change the shape type or add a new tag, and change the layer order for overlapping objects to control their visibility.
You are safe from mistakes
What if you want to revert anything? Undid some changes but then decided to keep them after all? Just press Undo or Redo buttons and keep going.
Restore mode allows you to restore deleted objects/figures that have ever been created in this project.
Import & Export
The Import application swiftly creates a new project and adds original DICOM volumes to it, while allowing the patient data to be anonymized.
Import DICOM Volumes
Import volumes in DICOM and NRRD formats without annotations
At any moment of the working process, if you want to use these results elsewhere, you can export them in a standardized format NRRD or STL and open them in software like MITK, 3D Slicer, etc.
Also, we have a specialized application to export data as a whole project that ensures convenience for future work in both platform and medical tools. It is also fully compatible with 3D Slicer and MITK.

Export Volumes with 3D Annotations
To Supervisely format, compatible with 3D Slicer, MITK
Collaborative teamwork
Distribute annotation work between colleagues using labeling jobs.
Labeling Jobs and other collaboration tools in Supervisely helps to organize efficient work and complete the tasks like:
-
Job management - the need to describe a particular task: what kind of objects to annotate and how
-
Progress monitoring - tracking annotation status and reviewing submitted results
-
Access permissions - limiting access only to specific datasets and classes within a single job
-
And what's more, you can take a screenshot for urgent tasks without using additional apps and quickly share the link.
To sum up
This toolset is truly convenient and stands out among its competitors, with significant potential for further enhancements. It is remarkably user-friendly and requires minimal setup to get started.
Supervisely for Computer Vision
Supervisely is online and on-premise platform that helps researchers and companies to build computer vision solutions. We cover the entire development pipeline: from data labeling of images, videos and 3D to model training.
The big difference from other products is that Supervisely is built like an OS with countless Supervisely Apps — interactive web-tools running in your browser, yet powered by Python. This allows to integrate all those awesome open-source machine learning tools and neural networks, enhance them with user interface and let everyone run them with a single click.
You can order a demo or try it yourself for free on our Community Edition — no credit card needed!
Liked this blog post? Share it!


Subscribe to new blog posts
Table of Contents
🤖 Try Supervisely: it's free!
Full stack platform with hundreds of Apps ready to solve any computer vision task: from labeling to model training. Create account


